
Most of the information stored in your Team Information screen is set when your team signs up for a SwimTopia / Team Topia subscription. These fields can be edited, but be aware of fields that should not be edited without notifying SwimTopia (noted below).
Covered in this Article:
- Accessing the Team Information Screen
- Naming, Abbreviations, Account Prefix
- USA Swimming Teams - Club Code and LSC
- Preferred Swim Course (Pool Length)
- Local Time Zone
- Team Logo
|
➧ Accessing the Team Information Screen |
|
Go to Manage Team > Settings > Team Information |
➧ Naming, Abbreviations, Account Prefix |
|
As stated previously, these fields were populated from the information provided by the person who filled out the signup form. This information does not usually change, but can be edited as needed here. Account Prefix: You will notice that each account# on your People page begins with the same prefix. That prefix comes from the “Account prefix” field here. » Note: Your team abbreviation is necessary to match up your team's results when you import results files. It is important that you do not remove or change this abbreviation without consulting SwimTopia's Customer Happiness team. |
➧ |
|
SwimTopia integrates with SWIMS 3.0, syncing USA Swimming membership information and status with each member’s SwimTopia account information. If you confirmed being a USA Swimming team on the SwimTopia signup screen, or have connected your SwimTopia account to your USA Swimming account, your SwimTopia team site is configured to integrate your member data with USA Swimming. Your Abbreviation/Club Code and Local Swimming Committee (LSC) fields will be populated from the SwimTopia signup form if included at the time of signup. These fields will be read-only as required by this integration.
You must have SwimTopia selected as your team management vendor on the USA Swimming Club Portal to complete this connection. This selection should be done now, if not already completed. ➞ Connecting USA Swimming and SwimTopia » Note: If an LSC was not entered at the time of signup, enter that here. If you need updates to this read-only information, contact our Customer Happiness Team for assistance. |
➧ Preferred Swim Course (Pool Length) |
|
The course length you select will be the default course for any new/blank swim meets you create, for all relevant reports, and for times history displayed under “My Account.” |
➧ Local Time Zone |
|
Verify and set your local time zone.
|
➧ Team Logo |
|
Click Choose File to select a logo image from your local drive to display in the header next to your team name on your website. (the team logo can also be managed from Website > Site Settings). 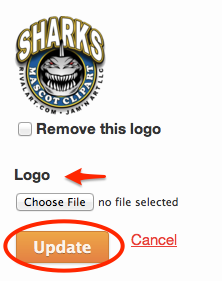 Click Update to upload your logo and save your changes. If you would like to see how your logo is viewed by your members, click View Site from the top right admin menu to exit the team management console and go to your home page. » Tip: A PNG format image is best because they have transparency and jpg images do not—if your logo has a white box around it that’s not part of the logo, you’ll want to acquire a png version. |
➞ Next: check your Billing Contact settings.
hcmanagesettings hcmanagesettingsteaminformation hcmanagesettingsbillingcontact
Comments
0 comments
Please sign in to leave a comment.