
This feature is available to our Premium customers.
To sell items from your team’s merchandise catalog on your website, you will enable the page dedicated to the Online Store feature.
➧ Who's ready to let SwimOutlet do all the work? See ➞ our SwimOutlet Team Store Snippet for more details.
Covered in this Article:
- Online Payment Processor Required
- Enabling the Online Store
- Disabling the Online Store
- The Online Store Page
- Adding/Removing Items Using the Merchandise Offer Snippet
- The Shopping Cart Snippet
- Unique Sidebar with Shopping Cart Snippet
- Managing Orders
- Reports
Online Payment Processor Required
» Note: At this time, offline (paper) checks and private/club accounts cannot be used as a checkout method. A secure online payment account is required and must be set up and verified before you can enable the Online Store. See ➞ the Stripe Account Setup tutorial for instructions on creating and connecting a Stripe account to your SwimTopia website.
➧ Online Payment Account Status
The online store is automatically set to use Stripe for all teams with an active Stripe account (SwimTopia's only supported online payment vendor as of 1/1/23).
➧ Processing Fees
The Seller (your team) pays the fees. There is no way to designate otherwise, so increase your prices if you need to account for the 3.4% + 30c processing fee per transaction.
Enabling the Online Store
Enabling the online store feature adds an Online Store page to your website and enables the Merchandise Offer Snippet (described below).
Go to Manage Team > Website > Online Store.
To enable your online store, check the Enable Online Store Feature checkbox.
If you do not have an online payment processor account set up, or if there is an issue with your account settings, you will see an alert. Click the button provided to manage your account before you continue.
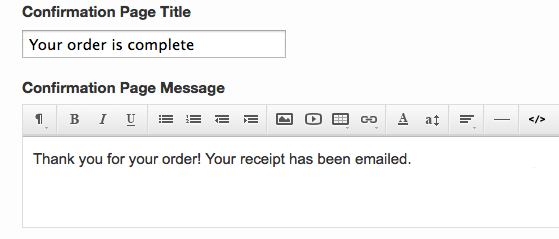
Next, enter a custom confirmation page for your users. This message will be loaded on the Online Store page after a successfully completed checkout.
Enter a custom confirmation email message.
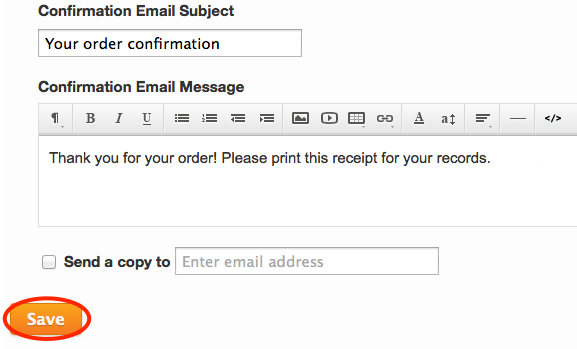
"Send a copy to" (Optional) - Enter an email address to receive copies of each email confirmation.
Finally, click the Save button to enable your Online Store Feature and save your confirmation messages. Once the Online Store is enabled, it will remain enabled until you disable it.
Disabling the Online Store
Disabling the web store hides your Online Store page and disables all Merchandise Offer snippets.
Uncheck the Enable Online Store Feature checkbox in your Manage Team > Website > Online Store tab and click the Save button.
To verify that it has been removed, you will see that the Online Store page is marked DISABLED in your Manage Team > Website > Pages tab.
» Note: Disabling the Online Store will not affect your online payment processor settings or preferences.
The Online Store Page
When the Online Store Feature is enabled, a new Online Store page will be added to your navigation on your website.
This page can be edited just like any other page, using snippets from Manage Website > Edit Page Content in the admin menu.
You can also rename the page however you would like under the page Properties
Disabling the Online Store will remove the Online Store page from your site, and will automatically hide the Merchandise Offer and Shopping Cart Snippets from the Snippets pane (see below).
Adding/Removing Items Using the Merchandise Offer Snippet
➧ Adding Items
A new Merchandise Offer Snippet will now be available to drag into any page on your website that Snippets are used, including the Online Store page. This snippet uses items that are in your Merchandise catalog, which are managed in the Manage Team > Merchandise tab from the admin menu.
See ➞ our Merchandise article for more information on creating and managing your catalog if you have not set up your merchandise items at this time.
» Note: If you have set an order limit on any of your "merchandise" items, you may not want to add those items to your store, or be prepared to watch the sales more closely. Order limits are only enforced during registration.
Select to Edit Page Content from your "Welcome..." menu and click on the +Add Snippet button.
Drag in a Merchandise Offer snippet to add an item for sale to your Online Store page.
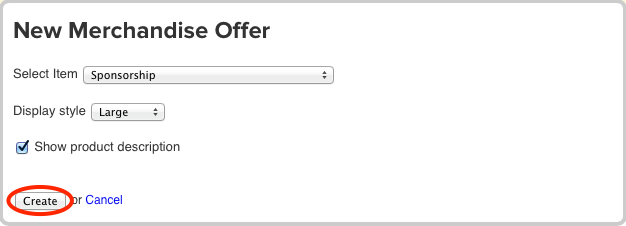
Select a merchandise item, an image display size, description display preference and click the Create button.
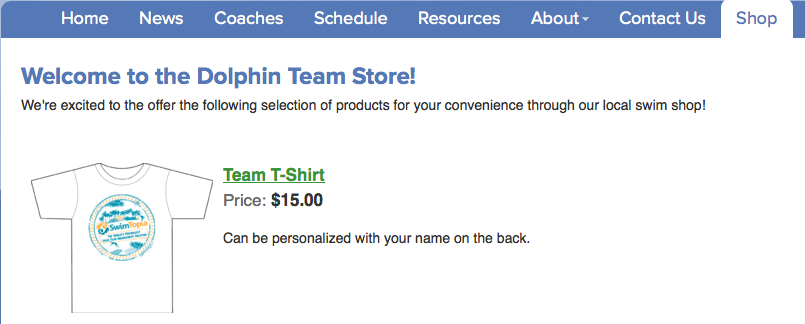
The item will be displayed with its image, name, price, and optional description (see above). You can add as many Merchandise Offer Snippets as you like to this page or any page or template on your site.
Users will click on the item name to enter options and quantities and to add it to the shopping cart.
Each time a user adds an item to the cart, an editable Shopping Cart on the Shop page is automatically displayed.
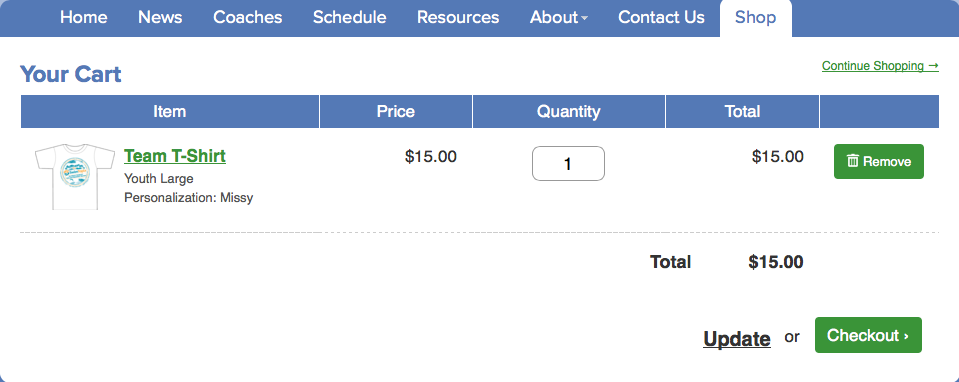
Adding an item to the Shopping Cart will trigger a small cart icon and item count in the admin menu at the top of the page. Clicking on this icon will send the user to the Shopping Cart page.
![]()
See ➞ our Merchandise Offer Snippet article for more information.
➧ Removing Items
To remove an item from your online store, or any place posted on your website, you just need to get into the edit mode on the page(s) to delete the item, as seen in the example below:
The Shopping Cart Snippet
A compact Shopping Cart Snippet is also available when the Online Store is enabled.
The Shopping Cart Snippet is only available from Manage Site > Edit Template Content in the admin menu.

Drag the Shopping Cart Snippet into any template, and click the Create button.

When items are in a user's Shopping Cart, this Snippet will display the name, image, and option selected for each item in the cart.
Clicking the View Cart button will send the user to the Shopping Cart page.

When a user's Shopping Cart is empty, the snippet will display with an empty cart message.

Unique Sidebar with Shopping Cart Snippet
» Note: if your Online Store is assigned to the Default template (or Right Sidebar template), anything you add to the sidebar in your Online Store will also be added to all other pages that are assigned to the Default (or Right Sidebar) template.
For more information on templates, See ➞ our Help Center article about Page Layouts & Templates.
Want to create a unique sidebar with a shopping cart for your Online Store page?
Follow these steps:
➧ Step 1) Create a new template (i.e., Online Store)
- Go to Manage Team > Website > Templates
- Click on "New Template"
- Name your template (i.e., Online Store)
- Select "Default" for the layout
➧ Step 2) Assign the new template to your Online Store page
- Go to Manage Team > Website > Pages
- Click on "Properties" for your Online Store
- Under "Page Template," select your new template (i.e., Online Store)
- Click "Save"
➧ Step 3) Add snippets to your new sidebar
- Go to your Online Store page ("View Site")
- Select "Edit template content"
- Add your Shopping Cart snippet to the sidebar
- Add any other snippets you'd like to your sidebar
Managing Orders
All Online Store orders can be managed in Manage Team > Merchandise > Orders.
See ➞ the Managing Online Store Orders tutorial for more information.
» Note: Keep in mind, this is a different location from managing Registration merchandise orders, which are found under Reports > Merchandise. These reports are not combined by design at this time, since some teams wish to separate registration purchases from online store purchases. (see report link below for more details.)
Reports
See ➞ our Help Center article Merchandise Reports - Orders Placed through Registration and the Online Store.
hcmanagewebsiteonlinestore
Comments
0 comments
Please sign in to leave a comment.